Page 8 of 32
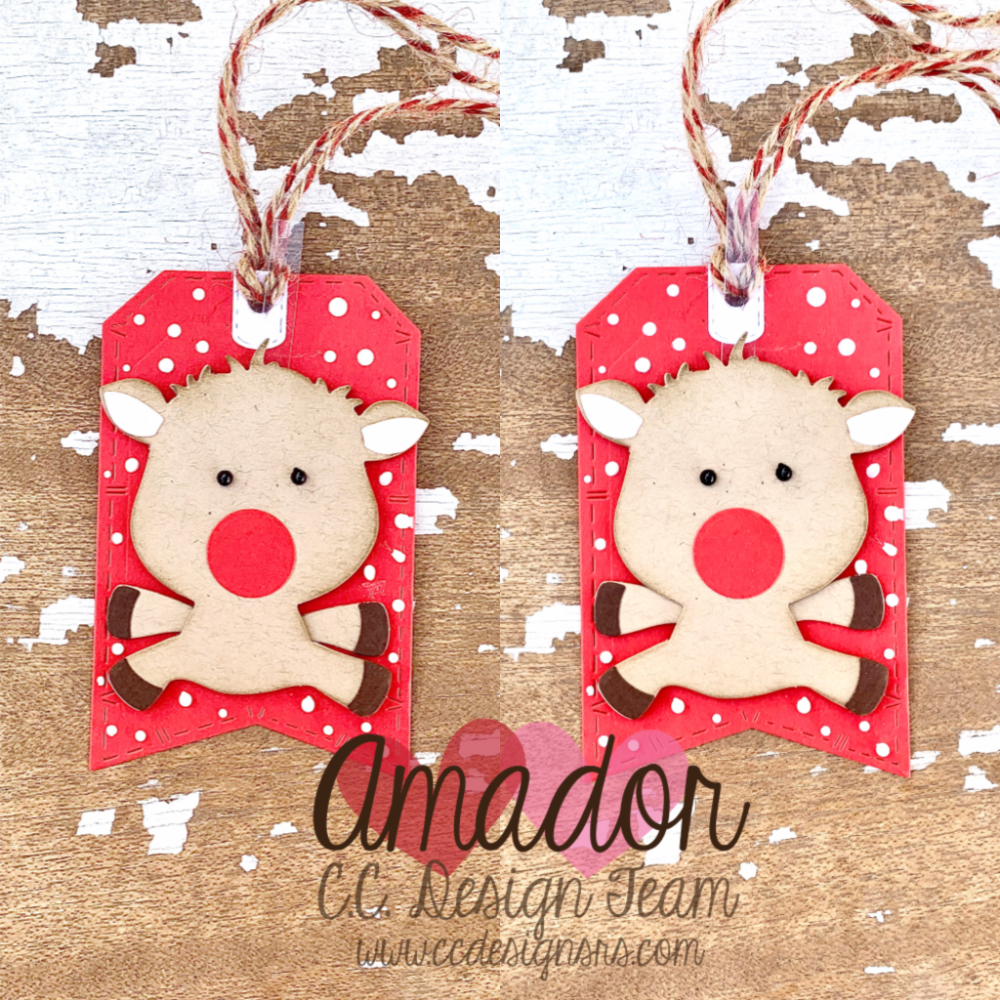
Hello everyone today we are going to make a Reindeer Tag Ornament for C.C. Designs. This can be given as a gift tag, ornament and a card. The action part will be the reindeer’s hands going up and down to… Continue Reading →
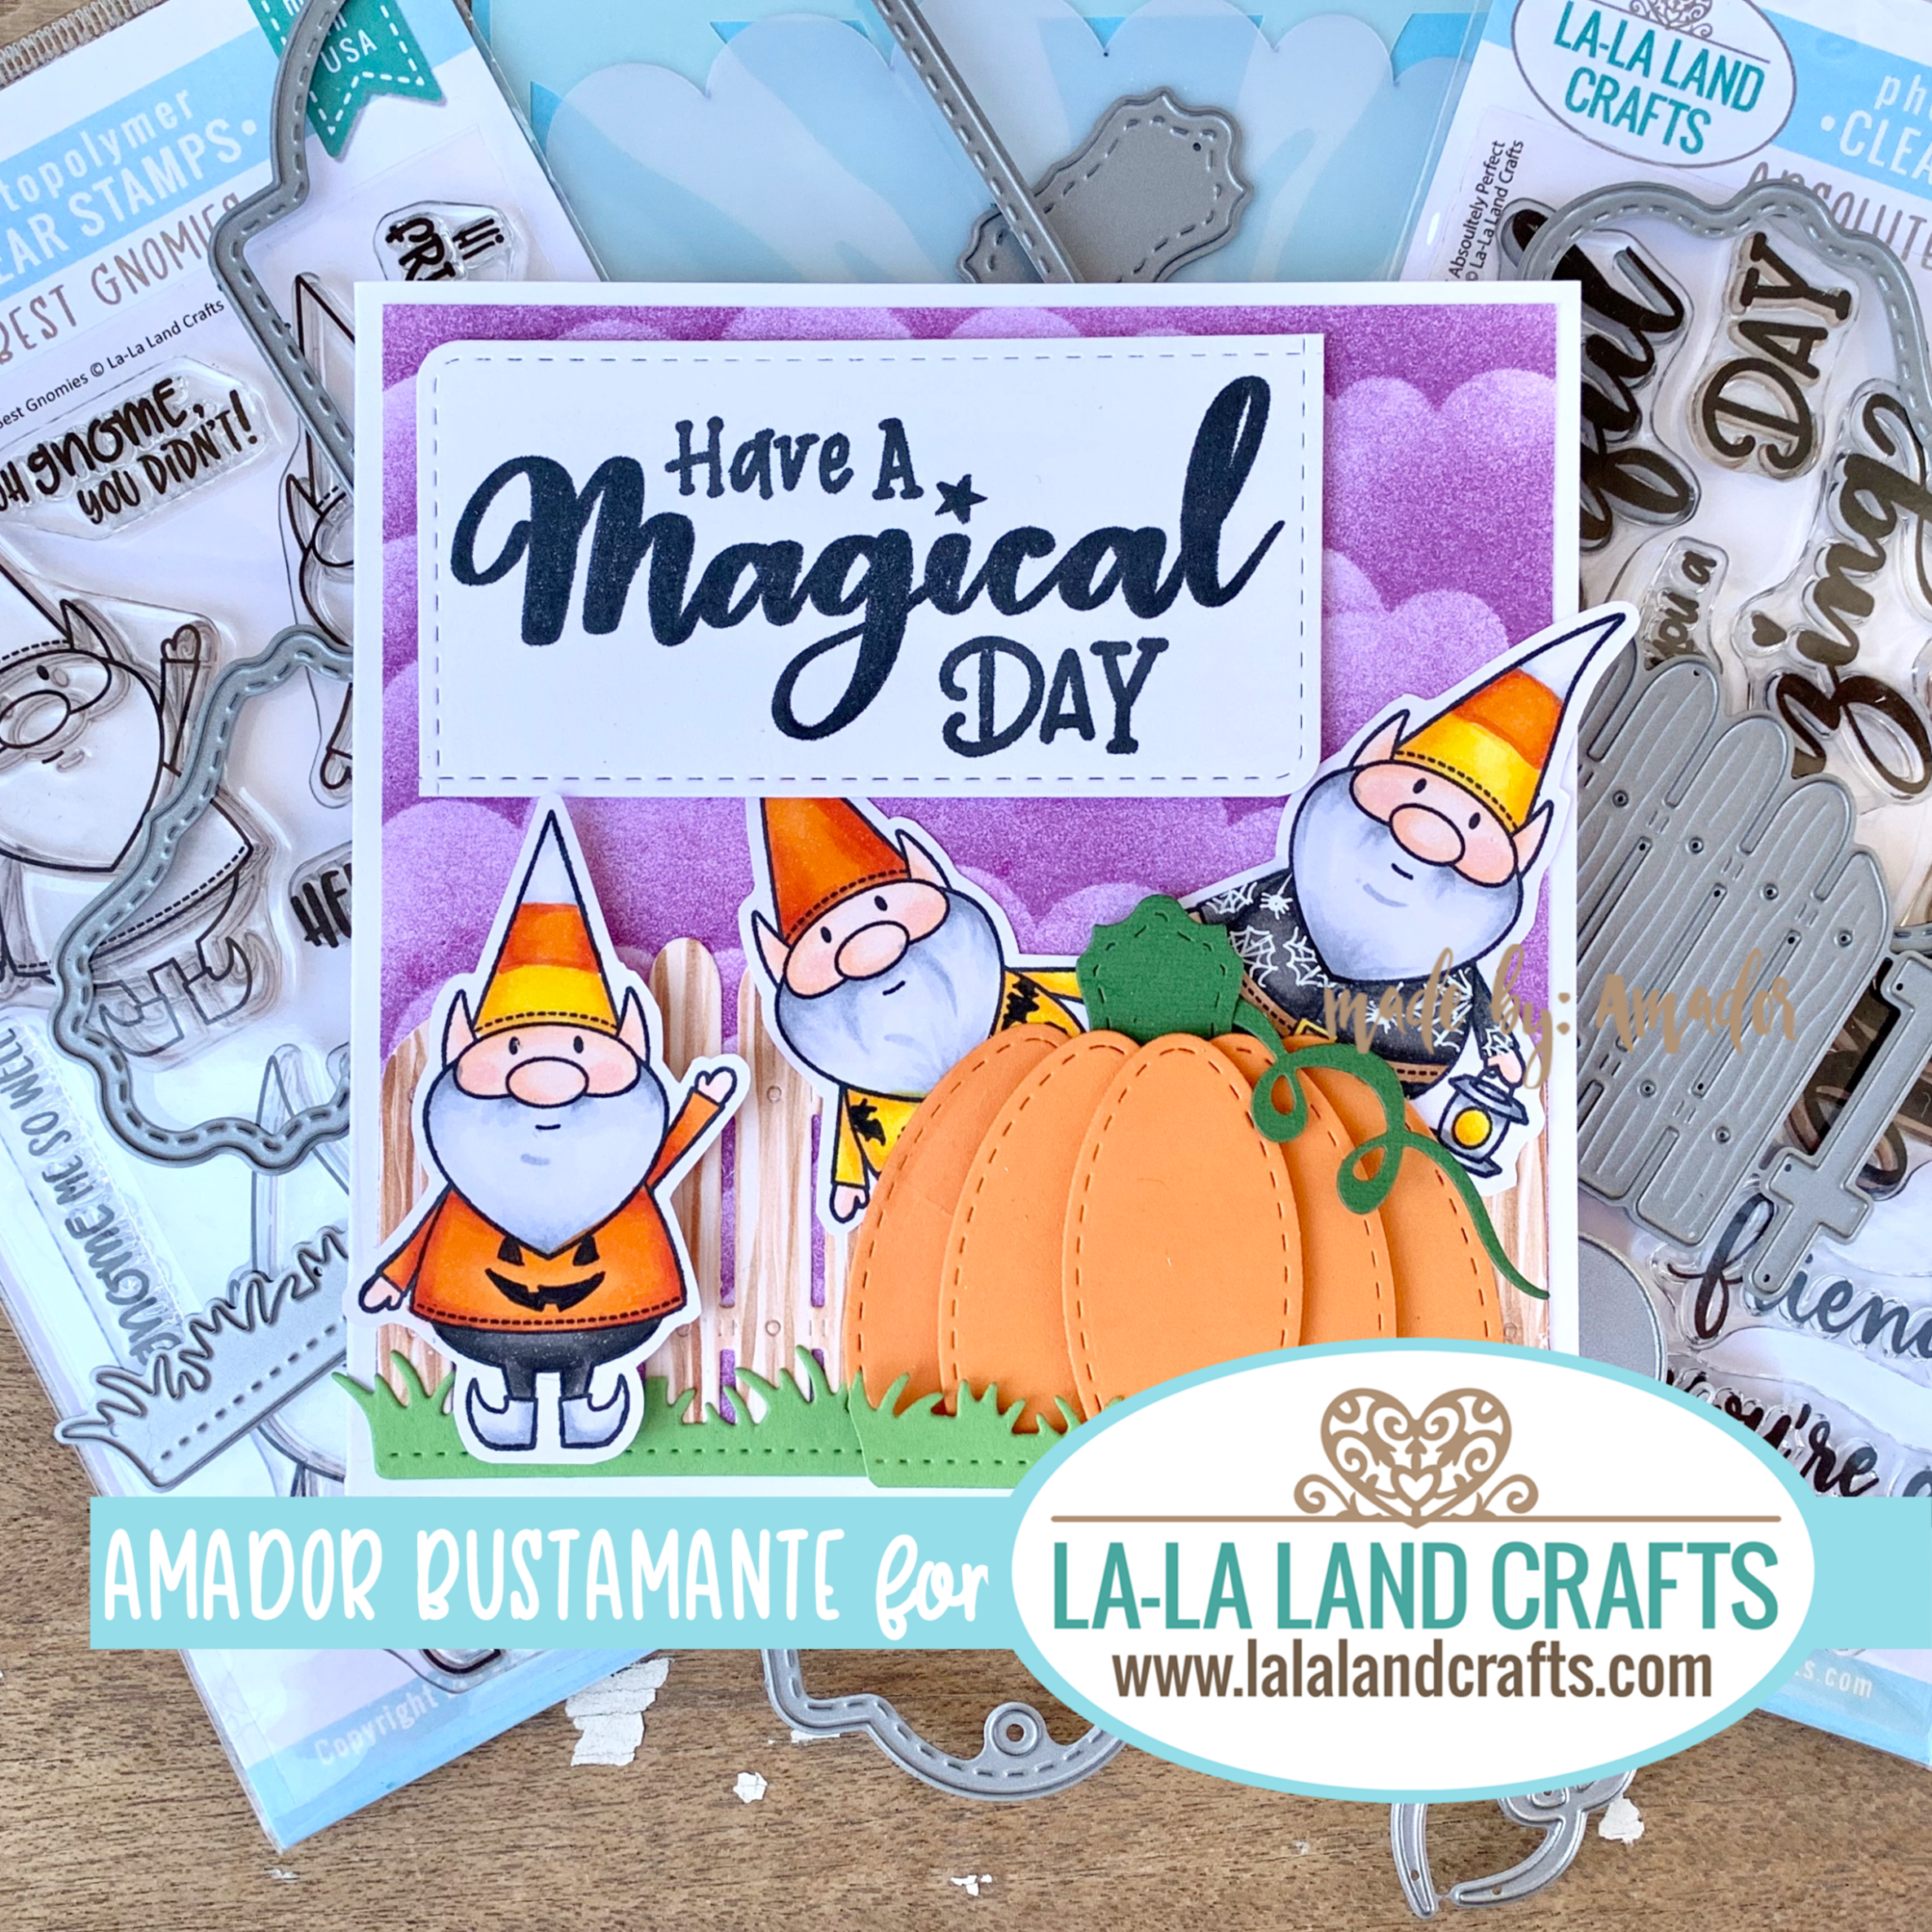
Halloween is upon us and bring on the Candy Corn!!! Yes I am one of those few people that actually like Candy Corn so for today’s card I wanted to make Candy Corn Gnomes with the Best Gnomie Clear Stamp… Continue Reading →
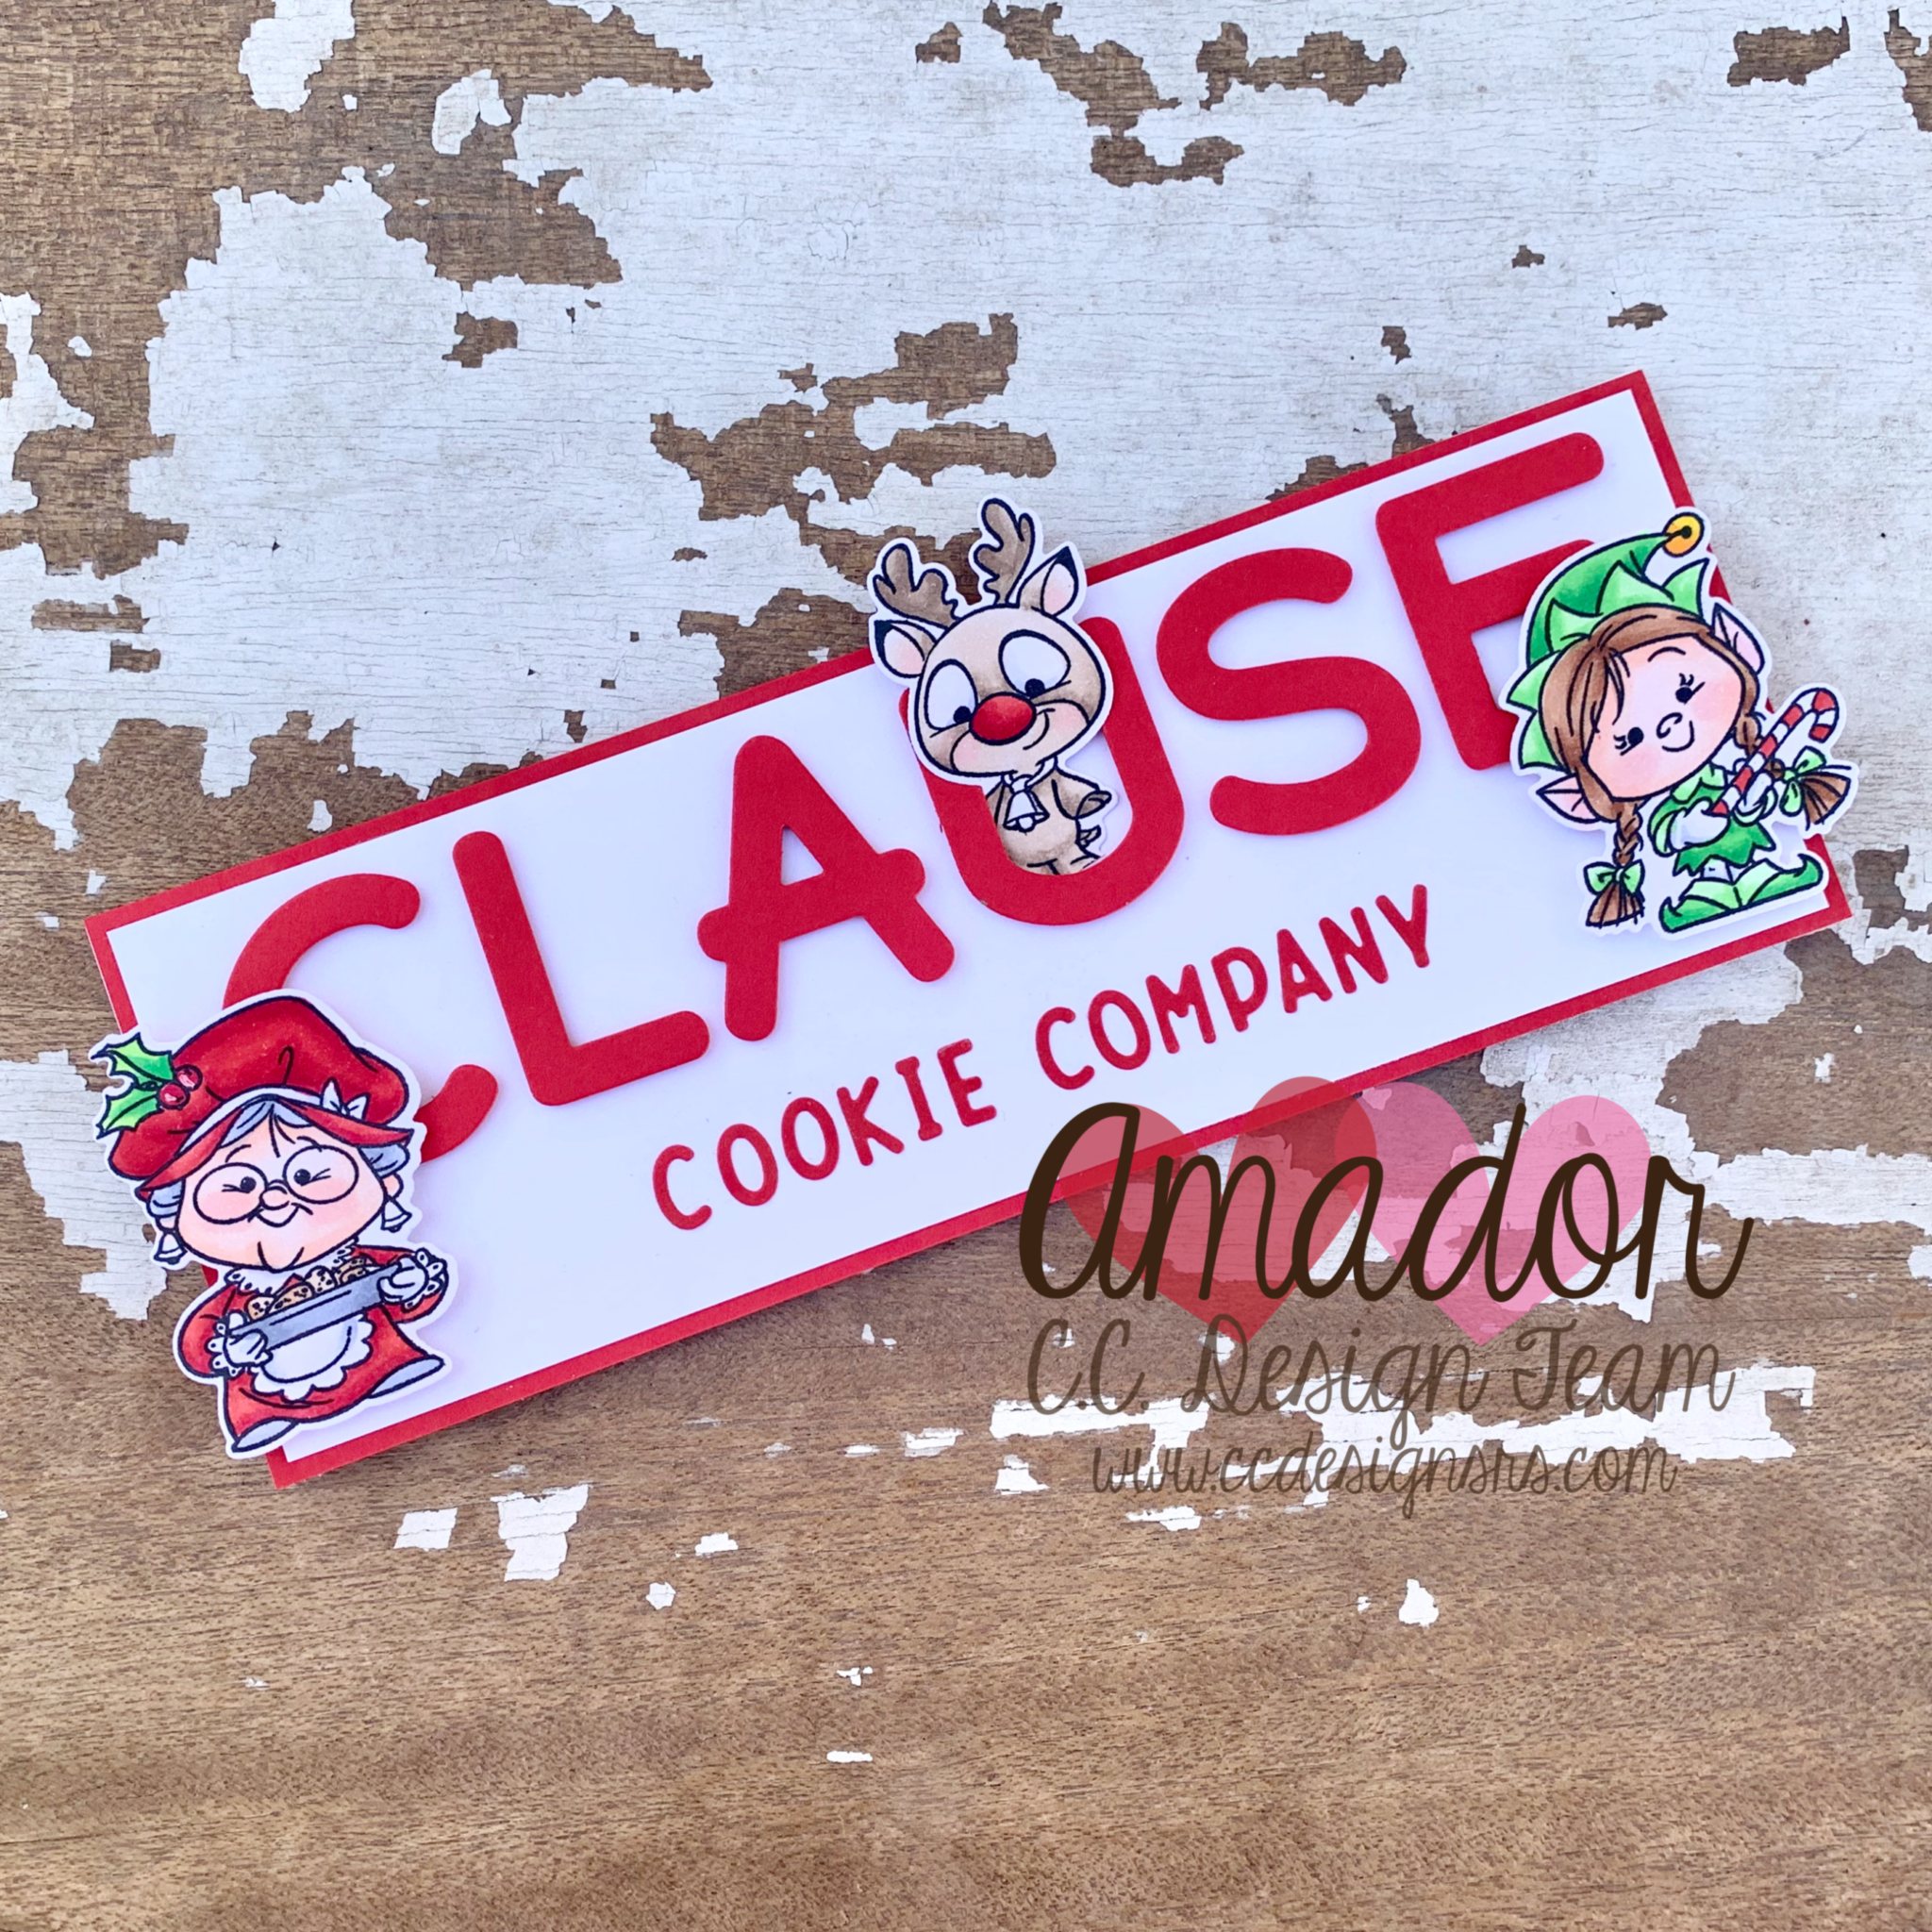
I wanted to create a long card inspired by the Christmas Cookie Signs. I used the New Tiny Christmas Clear Stamp Set and Tiny Christmas Outline Die Set along with the Olive You Alphabet & Numbers Die Set for this… Continue Reading →
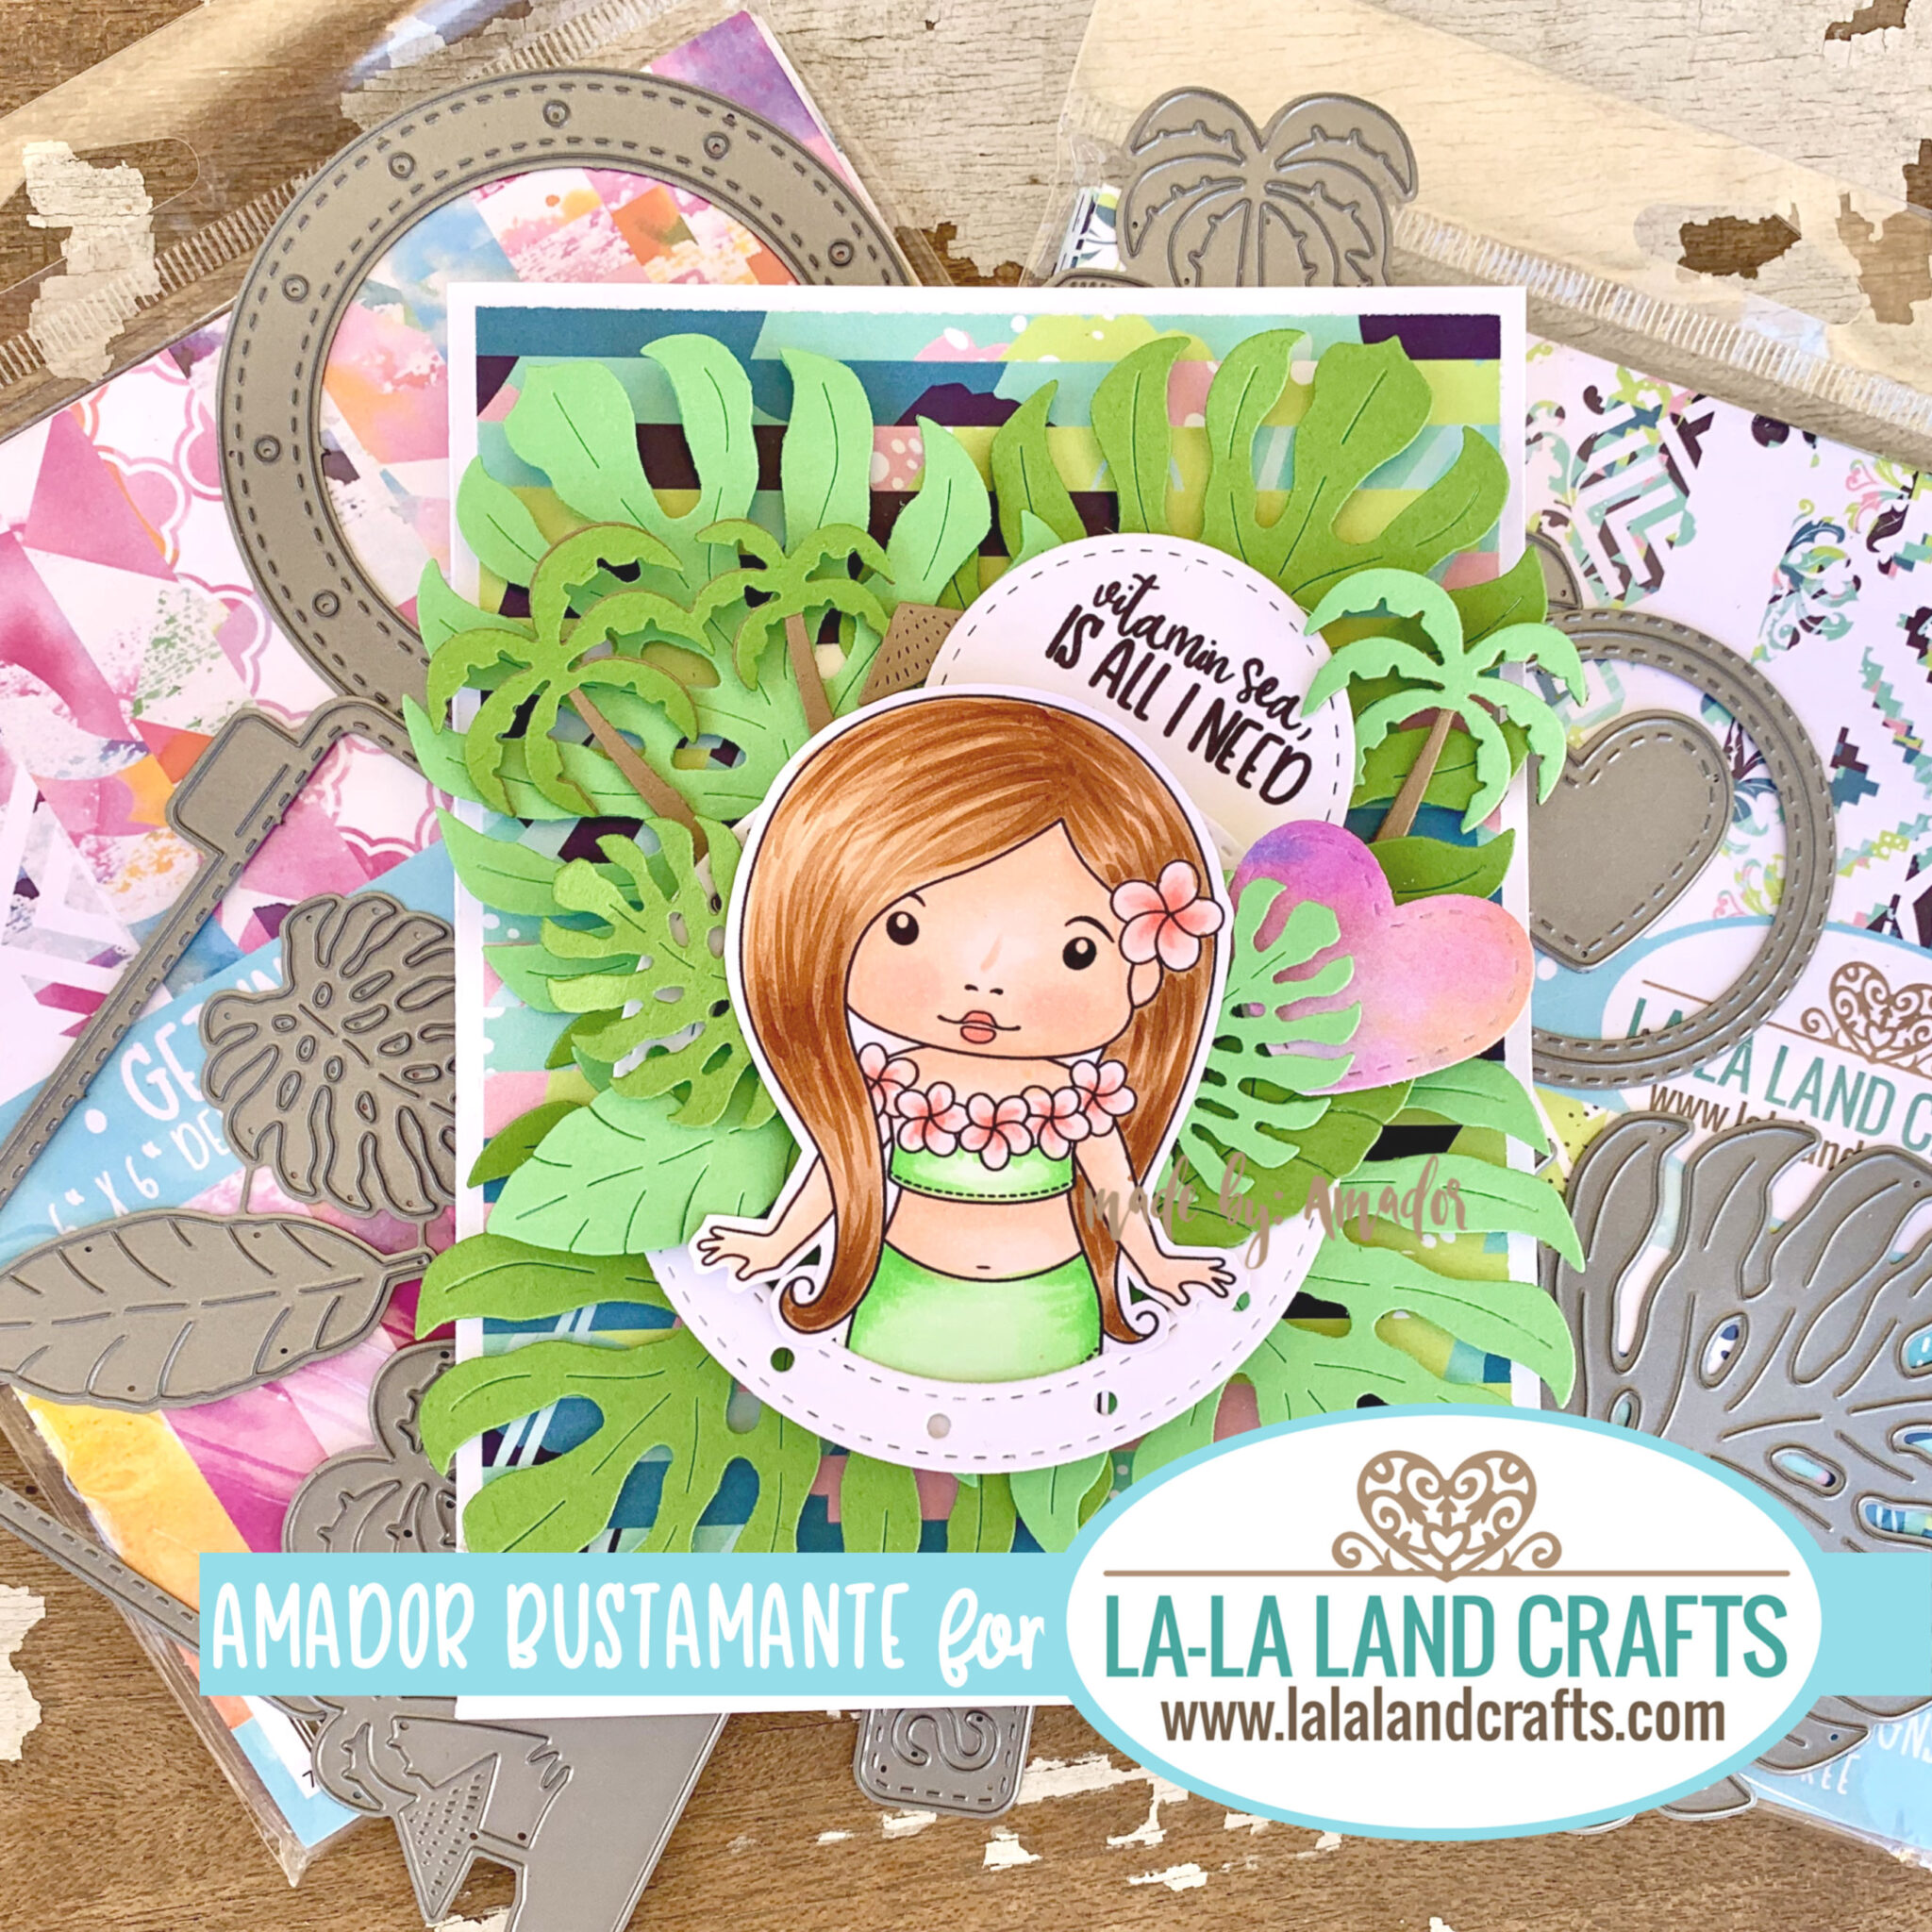
We would all like a nice Tropical Summer with the La-La Crafts Plumeria Lei Marci Rubber Stamp. Marci is surrounded by fantastic summer vibes on this card. The card base is made with the New Endless Summer Paper Pad and… Continue Reading →
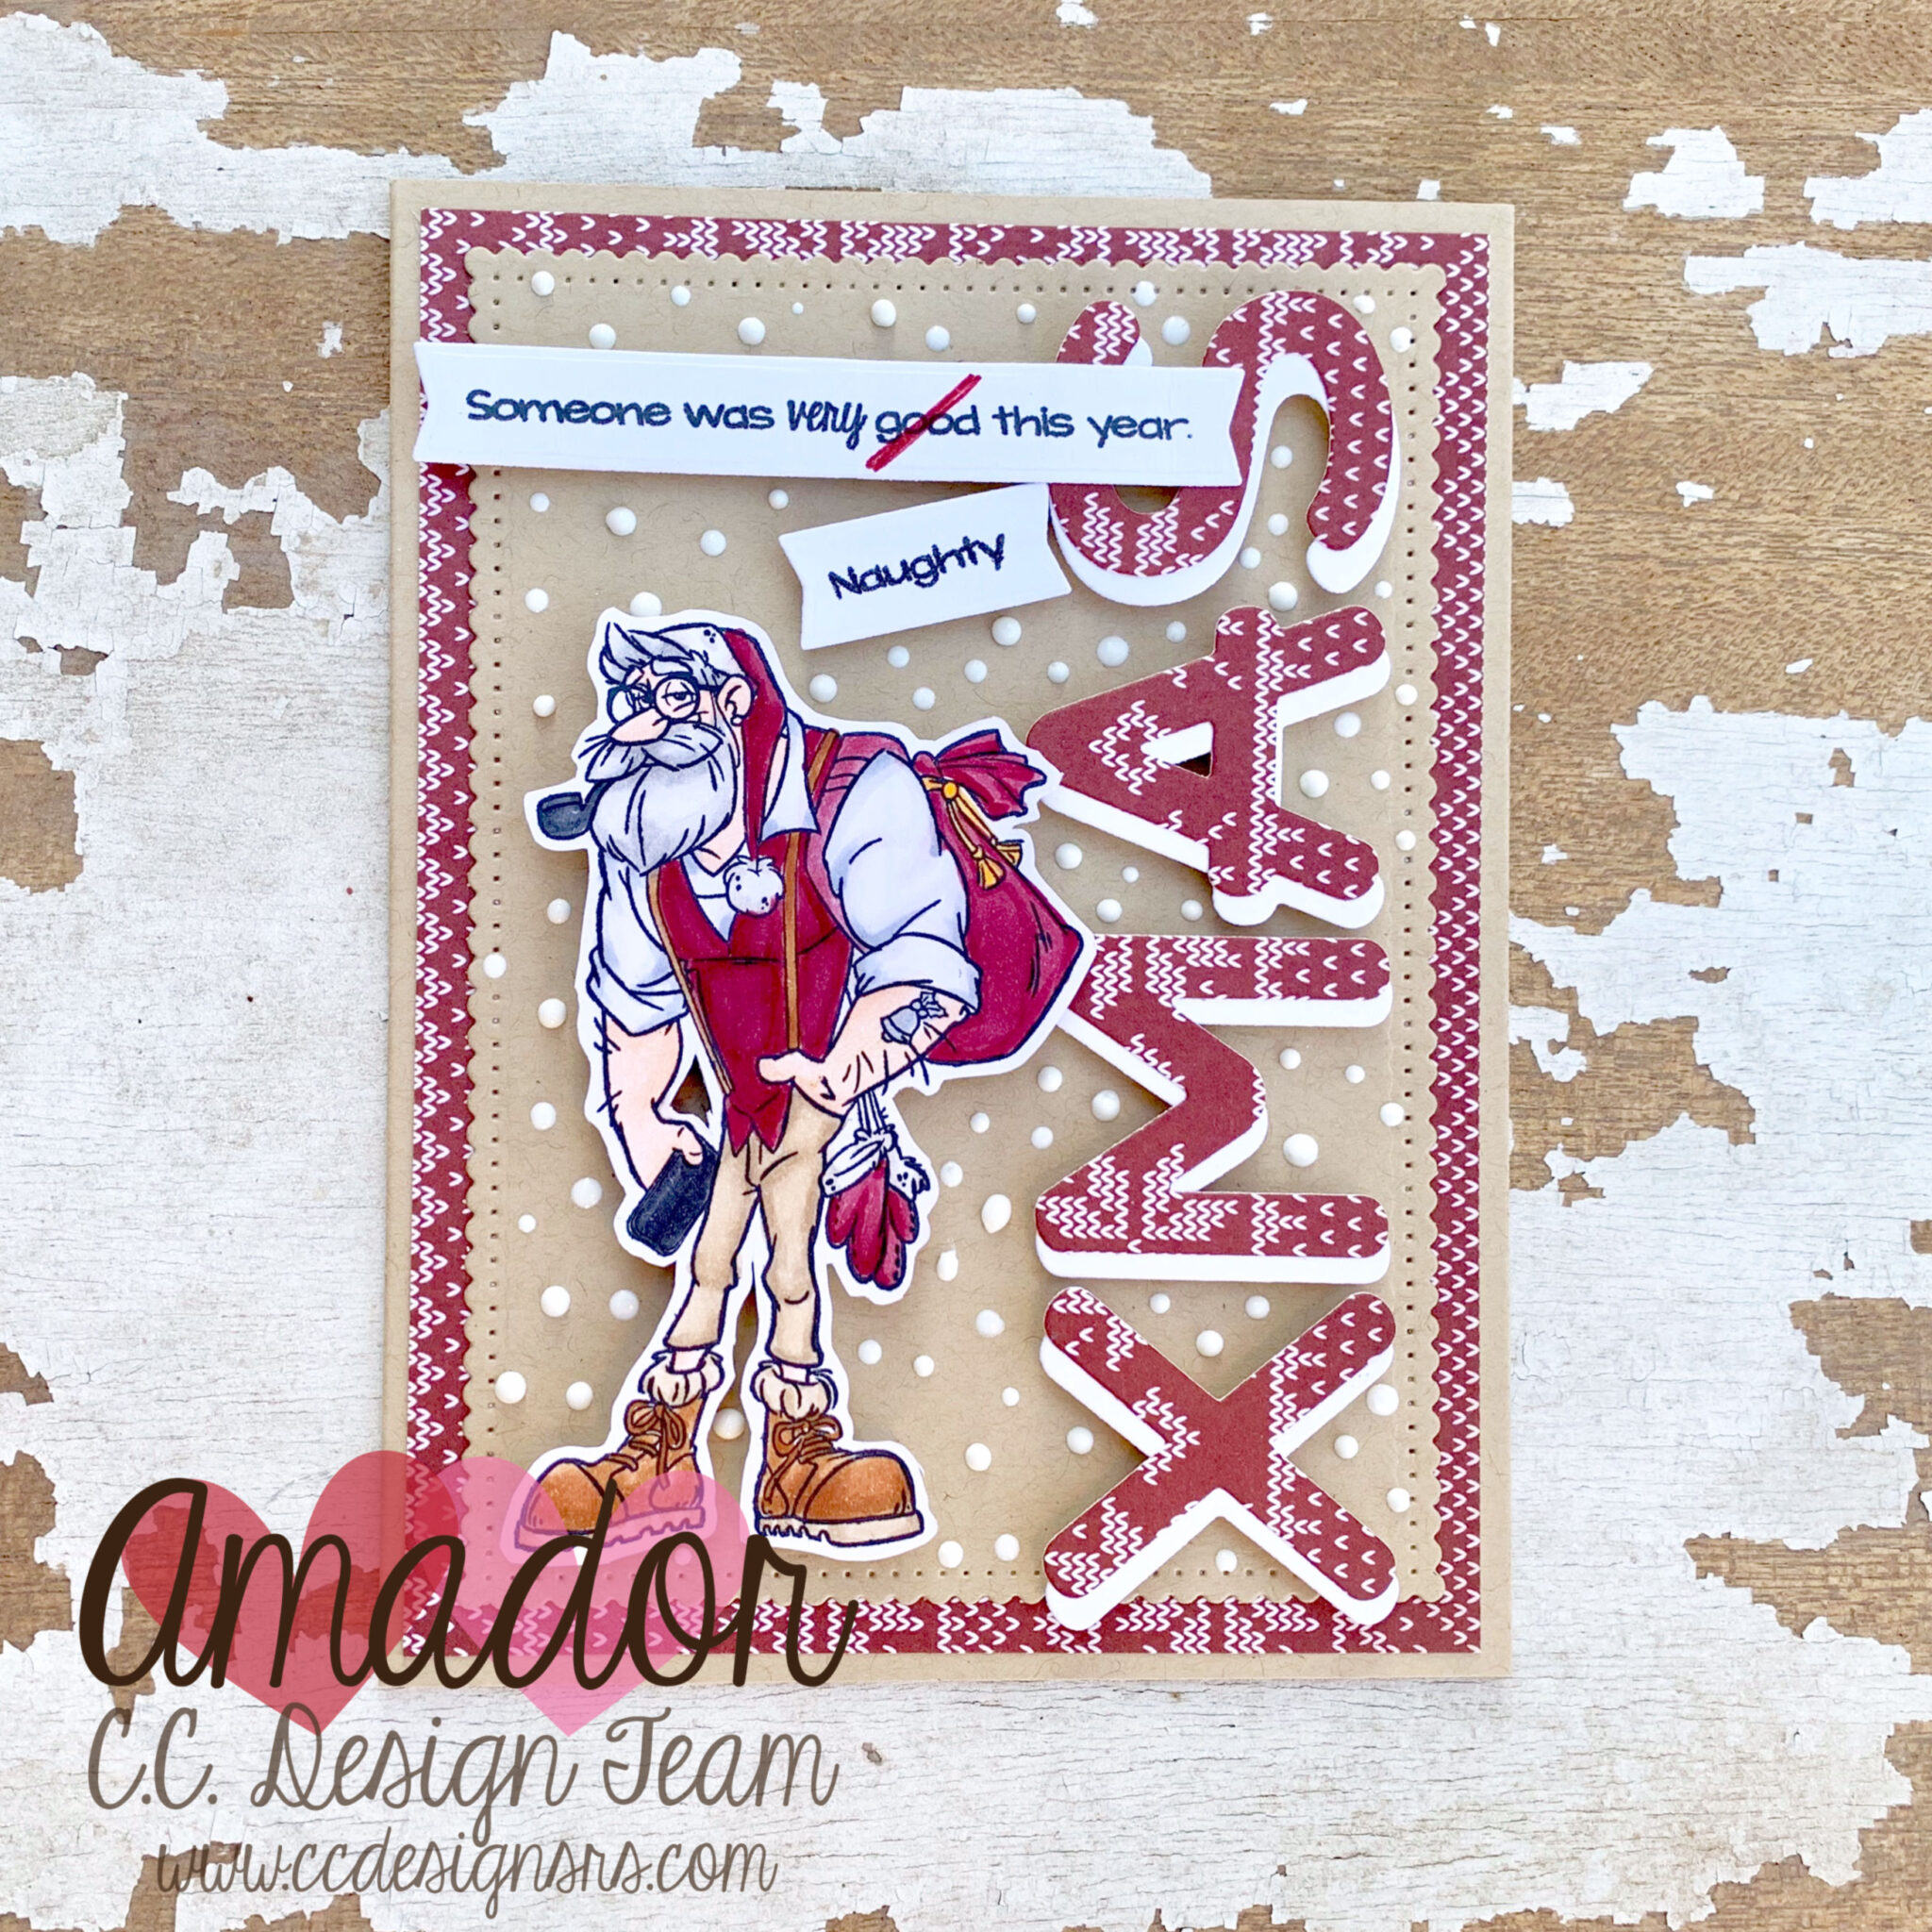
Its here and its all about Christmas! The C.C. Designs October Release is now available in the store!!! To celebrate I’m crafting with the New Hipster Santa Clear Stamp Set and stamped with the Black Olive Ink Stamp Set. Here… Continue Reading →